
Currently, Apache Zeppelin is the preferred notebook for Spark. It also offers a wide variety of other interpreters, markdown, and good visualization, which makes it a great tool for your Spark or general Big Data project. However, from y personal experience I have found that installing Zeppelin on Windows machine can be a bit complicated and somewhat frustrating. The official document says that you only need Java installed and Java Home for Zeppelin to work, even on Windows. However, it looks like a white lie to me. Mostly I have noticed that with those steps only you will see the following error message with Saprk interpreter.
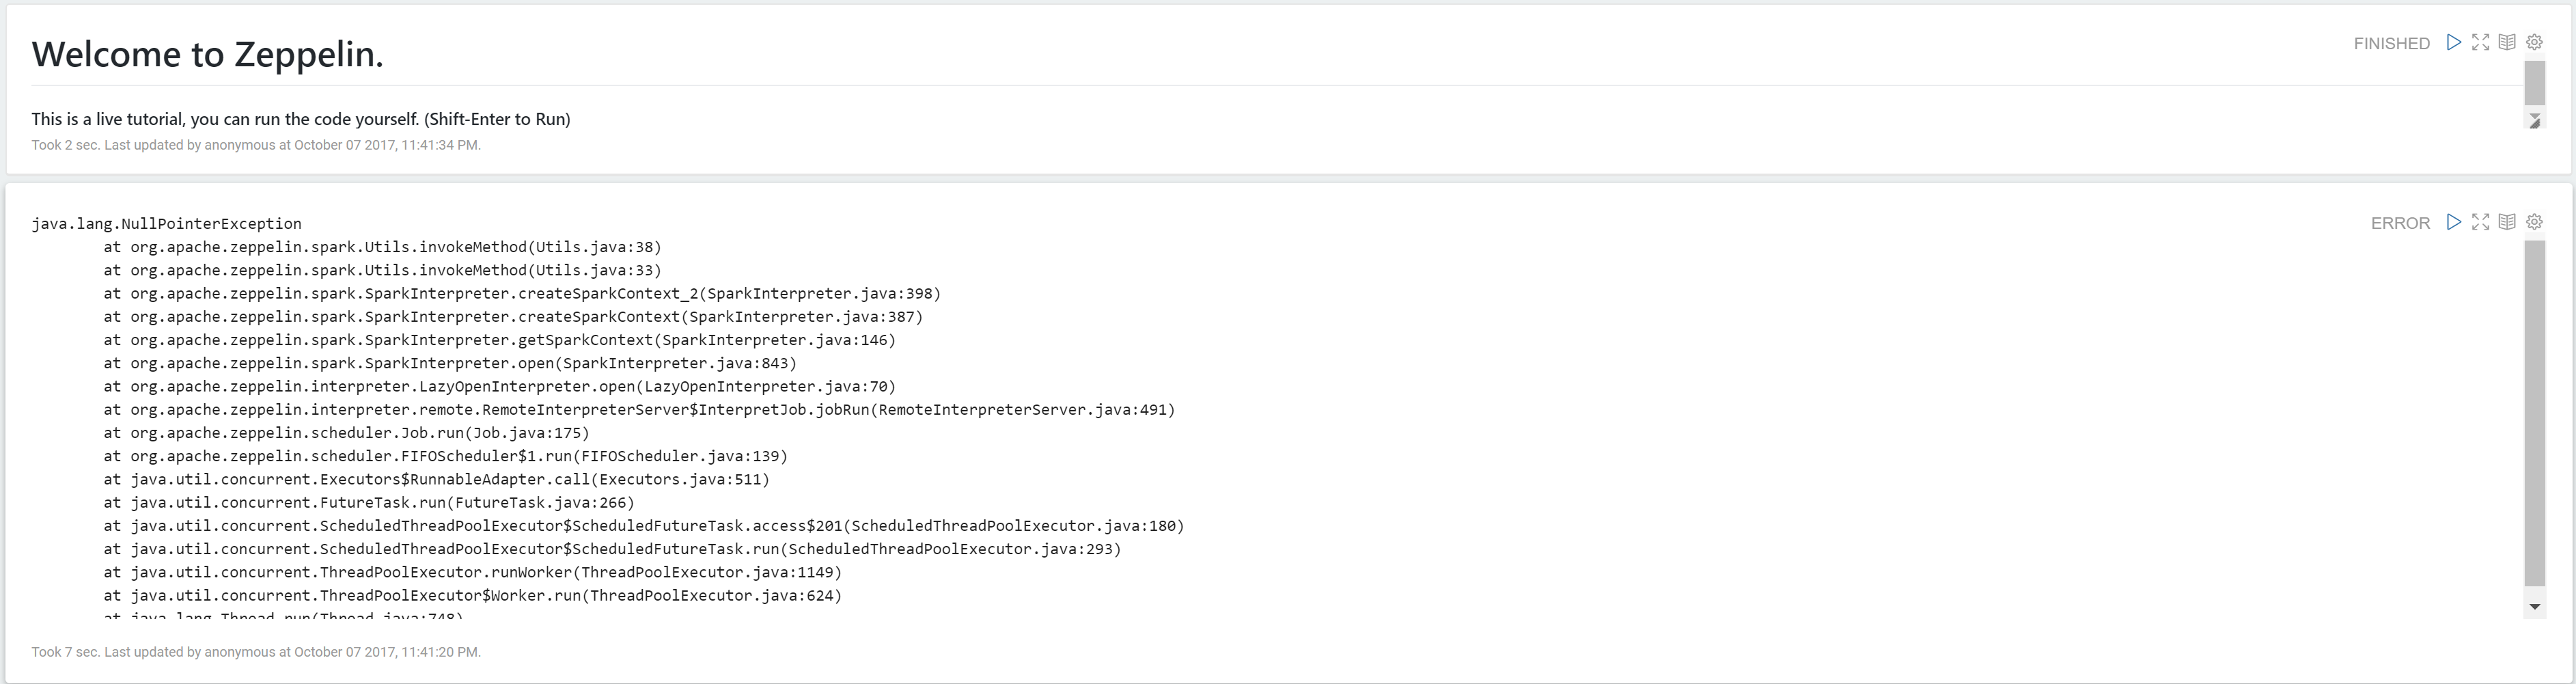
NullPointerException, thou mighty bitch
1. Install Java and set Java Home environment variable. This is a pretty standard procedure and people have been doing it since forever. (A recent hieroglyph found in Egypt describes how people used to do that in ancient Egypt).
2. Download Zeppelin notebook from here and extract (using 7-zip or other) it to your local machine. Avoid ‘C:\Program Files’ as the directory, if you don’t want to mess with admin privileges. I simply chose plain C:, but ‘C:\users\<username>’ is also fine.
3. Download Hadoop 2.7.x from here. Download binary, not source. Extract it to your machine, Again avoid ‘Program Files’.
4. Download ‘winutils.exe’ from here. Paste it in ‘<your-hadoop-directory>\bin’.
5. Set environment variable ‘HADOOP_HOME’ and point it to your Hadoop directory. Your final settings in environment variable should look like this.
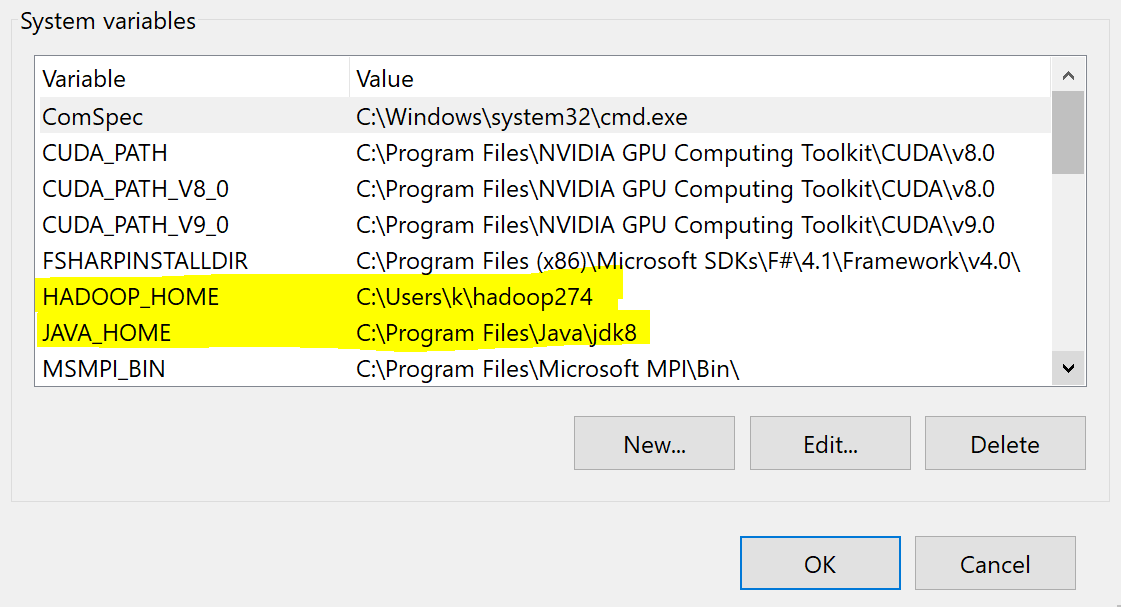
Your Environment variables should look like this
6. Go to Zeppelin-directory\bin and start Zeppelin by launching ‘zeppelin.cmd’
7.
a. Once inside zeppelin click on the menu on top right corner and select ‘interpreter’ as shown in the image.

Select Interpreter
b. Scroll down to Spark section and click on edit (pencil icon). Set the last variable ‘zeppelin.spark.useHiveContext’ to ‘false’


Set useHiveContext to false
C. Click on save button.
8. Now create a new notebook (or use the spark tutorial notebook). Save interpreter setting, keep Spark as default. Run the code ‘sc.version’. Viola, if you have not sinned too much in past you will see the following output.

It should show your Spark Version
Hey there 🙂
Your wordpress site is very sleek – hope you don’t mind me asking what theme you’re using?
(and don’t mind if I steal it? :P)
I just launched my site –also built in wordpress like yours–
but the theme slows (!) the site down quite a bit.
In case you have a minute, you can find it by searching
for “royal cbd” on Google (would appreciate any feedback) – it’s still in the works.
Keep up the good work– and hope you all take care of
yourself during the coronavirus scare!
Thanks! The theme is Base WP by Iografica Themes. It’s free to use theme so you can definitely use it.